|
|
DevelopmentSega Master System / Mark III / Game Gear |
Home - Forums - Games - Scans - Maps - Cheats - Credits |
Flash cartridge Projects by Gerry O'Brien
There are two versions of this DIY project for you to choose from. The first being a 512Kb memory size flash cartridge which uses an SMS 315-5235 paging chip. The second version being a 1Megabyte Memory size flash cartridge that uses a Game Gear 315-5912 paging chip.
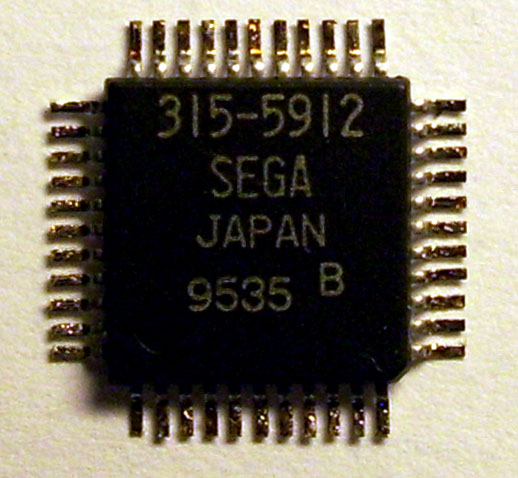
With the recent pinout mapping of the 315-5912 paging chip a majority of you may desire to build the larger 1Megabyte version.
Now keep in mind that if you are going to be using a Universal Programmer such as the "Willem" to program your Flash memory chips, you might be better off to build the 512Kb version. The reason being that the 8M-BIT TSOP 44 pin flash chips are much more delicate than a 32 Pin DIP/PLCC package flash chip. You will need the special TSOP 44 pin socket adapter for your Willem Programmer and also the same type of socket interfaced to your Flash Cartridge to accept the programmed Flash chip.
If you have the skills to build a custom programmer or a custom interface cable to connect to your Willem programmer; you can have the TSOP Flash chip embedded inside the GG cartridge permanently and program it through the cable interface. However, this is another project on it's own and will not be discussed here.
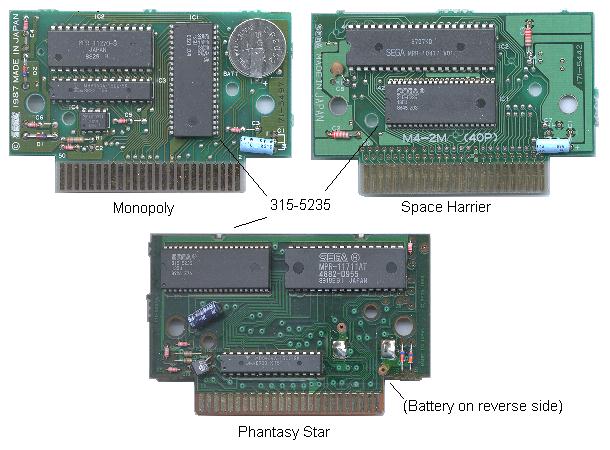
-=GG 512Kb Flash Cart Version=-

For this version of the project you will need an SMS game cartridge with the 315-5235 Paging chip such as the SMS Game "AFTER BURNER". You will also need a 4Mbit Flash chip such as the Atmel "AT49F040". You can download the full 26 Page PDF procedures guide along with the Schematics & PCB layout for the project from the links below:
DIY_SEGA_Game_Gear_512Kb_Flash_Cartridge.pdf
SEGA_GameGear_Flash_Cart_Schematic_Pack.zip
You can also visit Gerry's Youtube Channel where you can find five separate 10 Minute instructional videos for you to watch and follow during the building process. See below for the first of five instructional videos:
(:youtube YY-Yt31U3Oo:)
-=GG 1MByte Flash Cart Version=-
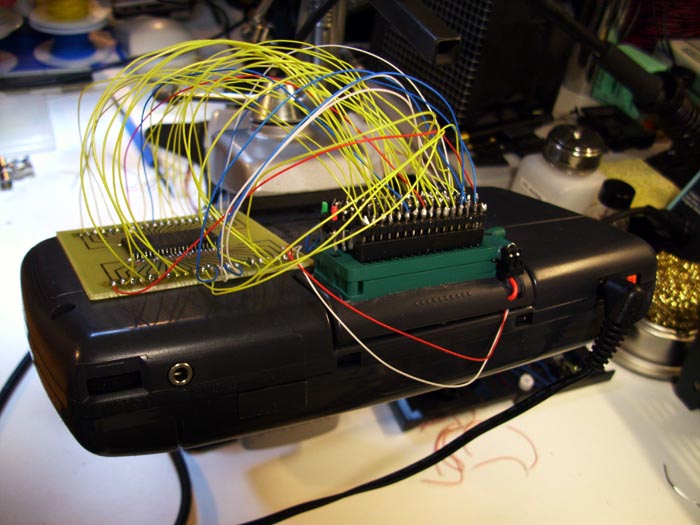
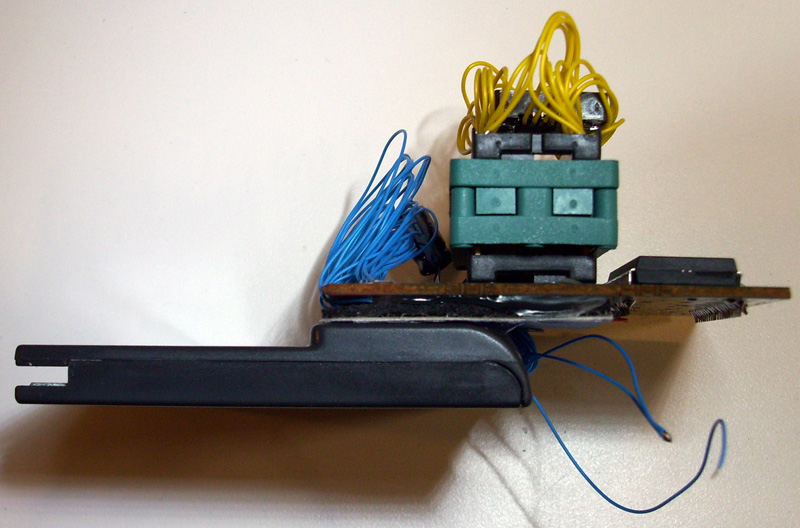
The Image above shows the Interface Testing RIG I assembled while trying to map the proper Pinouts for the 8M-BIT Flash chip.
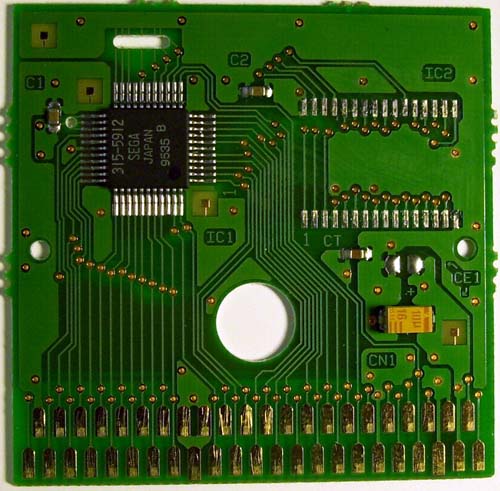
Now for this 1MByte version it is pretty straight forward. You essentially de-solder the MASK ROM from an 8M-BIT Game Gear cartridge. (Game cartridges like "Garfield" or "Sonic Blast") You are then left with a GG PCB as shown below:
You must then Interface an 8M-BIT Flash chip (such as the AMD "AM29F800BB") in place of the MASK ROM. As long as you match the pin connections form the Flash chip to the MASK ROM Contacts on the GG PCB, according to the provided pinout diagrams (Links Below); you will not have any problems.
- AM29F800BB Flash Chip for SEGA GG

- MPR-18201-S mask ROM pinout
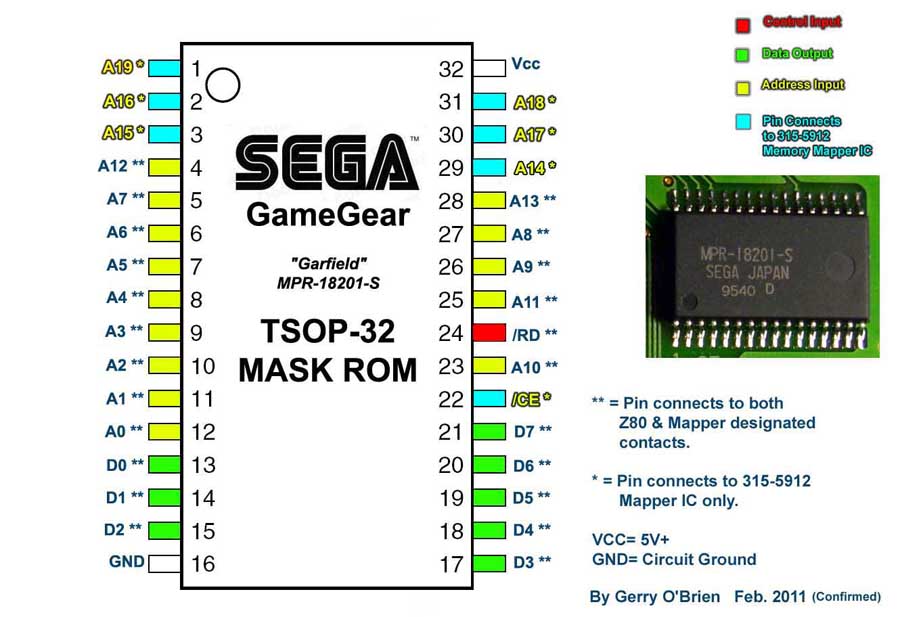
- 315-5912 pinout


The main concern here will be your method used for programming the Flash chip. If you manage to purchase the required TSOP 44 Pin sockets for both your Willem Programmer and another to connect to your Cartridge PCB to accept the Programmed Flash chip, it will work just fine. Just remember that the TSOP pins are very delicate and repetitive swapping may damage the pins.
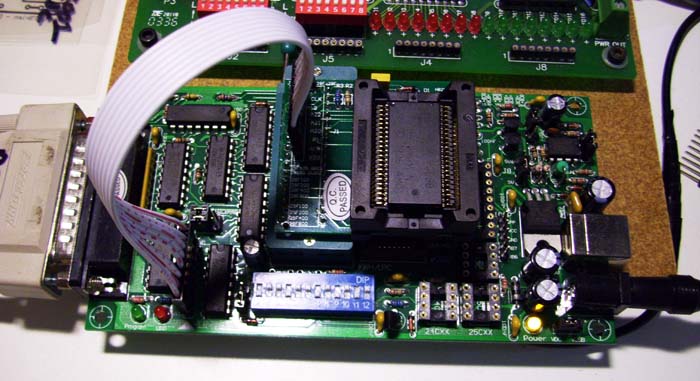
Below is an Image of the TSOP 44 Socket Adapter for the Willem Universal Programmer that accommodates the AM29F800BB flash chip.
The other alternative for programming your flash chip, is to build a custom programmer or a custom interface cable to connect to your Willem programmer. You can then have the TSOP Flash chip embedded inside the GG cartridge permanently and program it through the cable interface. But again as I mentioned earlier, this is another project on it's own and will not be discussed here.
You can visit Gerry's Website at the link below:
http://www.digital-circuitry.com/
Good Luck with all your Flash cart Projects Everyone!!
Enjoy. :)
