|
|
ScansSega Master System / Mark III / Game Gear |
Home - Forums - Games - Scans - Maps - Cheats - Credits |
Manual Scanning Guide
Introduction
This page documents one technique for scanning game manuals. It is intended to provide acceptable quality while minimising the effort required. You are welcome to scan any way you like, of course!
Software you'll need
- Irfanview
- Your scanner's TWAIN driver (don't worry, it'd be surprising if this wasn't already installed)
Setting the configuration
Select the scanner source
In Irfanview, select File -> Select TWAIN source.... You might have a few options in there - my scanner showed up twice, for example. Choose one that seems to match, and change it if it causes problems. One of the ones I had was a Windows XP wrapper for the scanning process, I want the other one (the native TWAIN dialog one).
Starting batch scanning mode
Now go to File -> Acquire/Batch scanning... and choose the configuration as below:
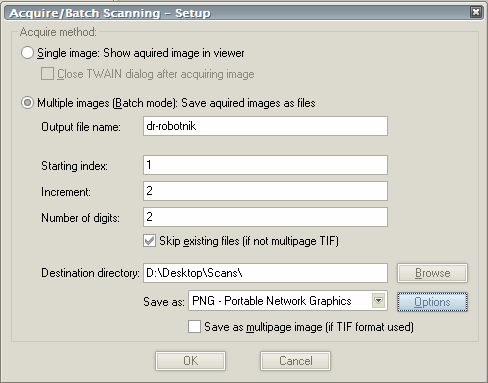
I've chosen the batch option, given it a helpful filename, chosen an empty directory as the target, and the PNG format (with the PNGOUT plugin off, for what it's worth - it saves a little time).
The numbering options were a mistake, but didn't break anything; leave them at the defaults.
TODO - make a better screenshot then!
Setting the scan parameters
Press OK and your scanner's dialog will appear. Most seem to look similar to mine:
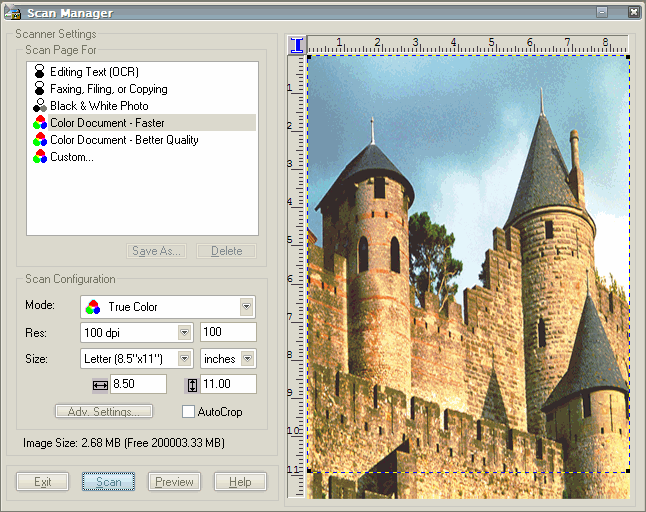
Notice the tasteful default image in there and the completely inappropriate settings. I put the manual in, opened out to scan 2 pages at once, and pushed into the corner of the glass:
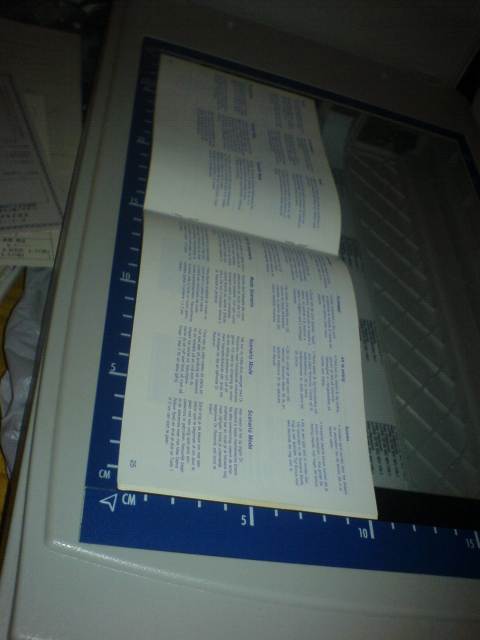
Then I close the lid and push down a bit to flatten out the spine. I click on Preview and the scanner does a fast low-res scan and fills the preview window with that. I can then click on there to crop the scanned area down to just the manual area.
I also change the settings to 300dpi greyscale. In the advanced options I've turned off every automatic "feature" since they almost always screw things up. I'll discuss the reasons for these settings later.
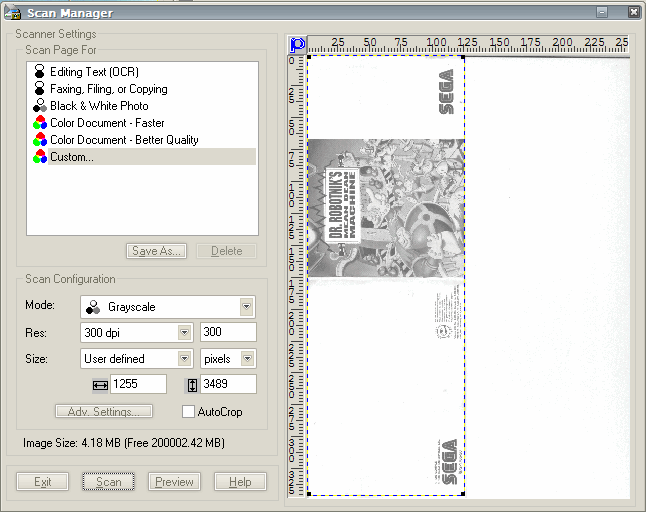
Now, thanks to Irfanview, every time I click on Scan, a numbered file is created in the folder I specified above, containing a scan of just the manual (2 pages in 1 scan). Because each set of 2 pages is the same size, so long as I line it up in the corner, I can change the page and scan with the same settings and the results should be acceptable. That's the gist of this method.
Doing the scanning without going nuts
Depending on how new and/or expensive your scanner is, each scan will take a fair amount of time. With my old and cheap scanner, it's around 30 seconds. Here are a few tips for reducing both the time and the boredom:
- On most scanners there's a scanning head with a light in it that moves across the page. It scans while going one way and it then moves all the way back ready for the next scan. As soon as it's finished scanning, and starts moving back - the sound it makes probably changes and the software probably also changes, in mine the progress bar reaches 100% and disappears - open the lid up, flip the page, line it up, and close. The scanner's light won't blind you (probably) and you can have it all ready to scan the next page as soon as the scanning head gets back "home".
- Don't just scan. If you have a TV in the same room as the computer, and there's something worth watching on, watch away. You don't need so much attention on this. No TV? Stick a DVD in the computer or download something to watch. Look for "always on top" options to avoid it getting lost as you click on the scanning software.
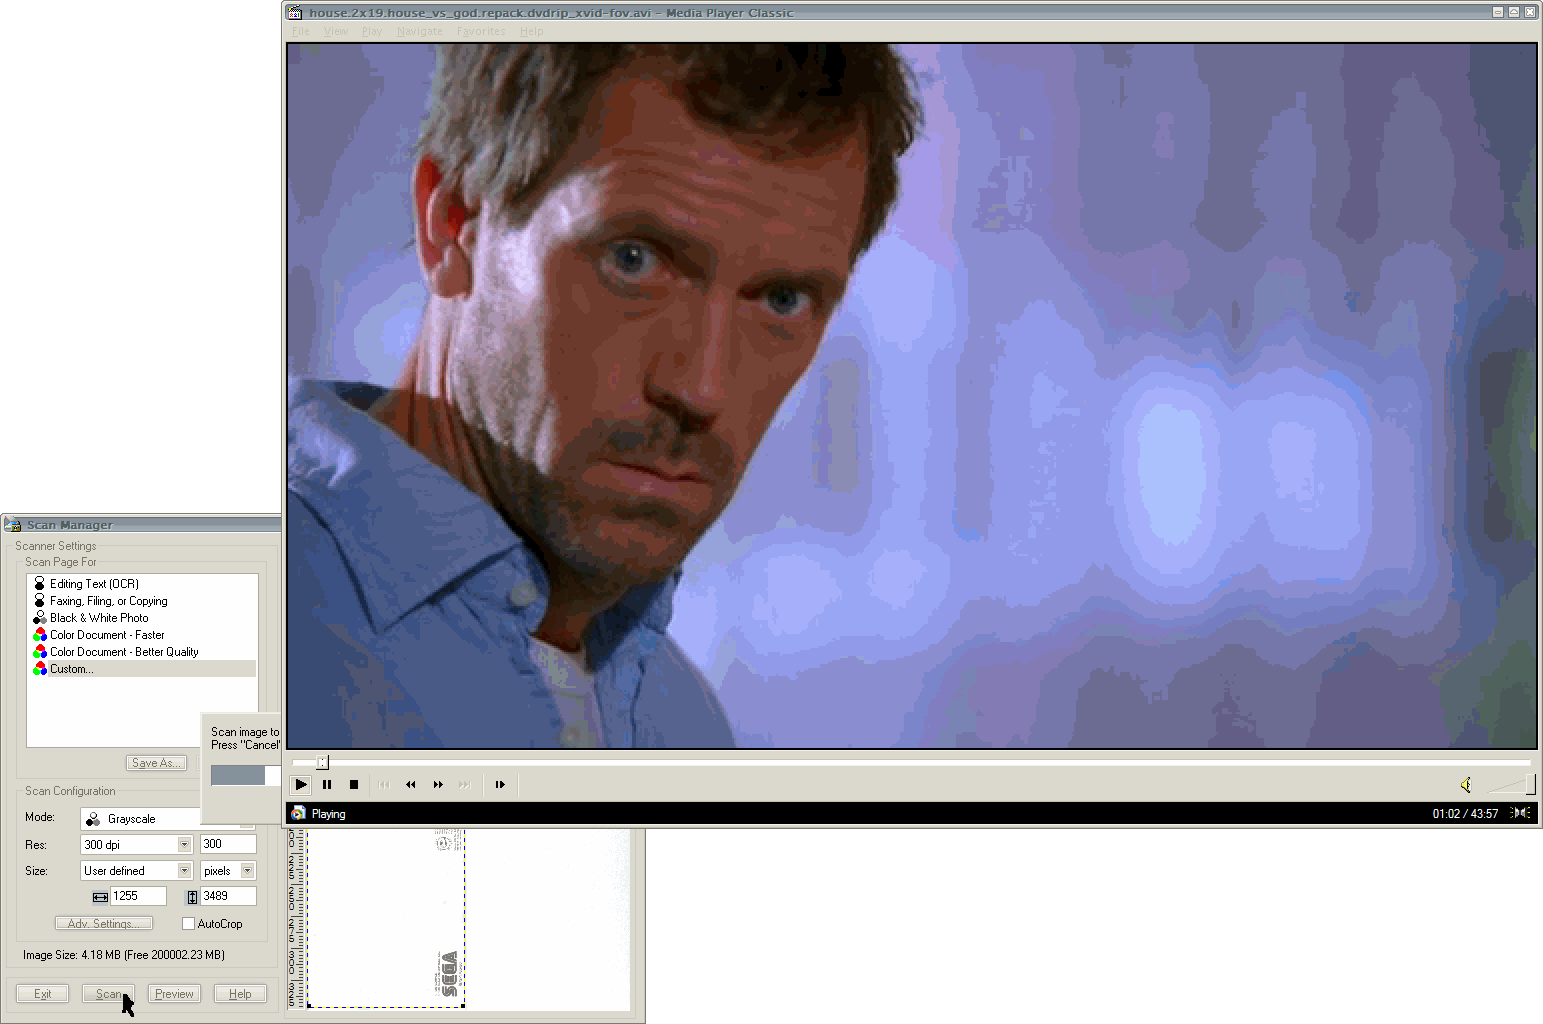
- If you're doing something on the computer screen as you wait, arrange the windows so (1) when Irfanview steals focus after each scan, the Scan button is still visible; (2) the Scan button is visible while your DVD or whatever is staying always-on-top; and (3) leave your mouse on the Scan button so you can just tap the button to do the next scan without having to mouse over to it. Here's me doing what I describe:
Now you can just listen to the scanner's sound to tell when to open/turn page/align/close/push on lid/click mouse/repeat. I scanned Dr Robotnik's Mean Bean Machine, a 48-page manual, using this technique and it took 16 minutes, that's 40s per scan including messing about checking what was on TV at the same time. At the end I have a folder with 24 double-page scans in it.
Batch processing
OK, so now we have a bunch of images that we need to rotate, split, save as JPG files and rename properly so they don't get mixed up. Luckily, Irfanview can do all this for us.
Backup
First, make a backup of all your original images. I make a directory called "originals" and copy them into there. If something goes wrong, at least we won't have to scan again.
Rotating
Now, drag and drop one of your scans onto Irfanview, then press B to open the Batch conversion window. Here's where the magic happens.
First, we'll rotate them all. Choose Add all to select all images for processing, and then Use this directory as output and Work as: Batch conversion. Output format is PNG. Check Use advanced options and click the Set advanced options button. Uncheck everything except Rotate right (assuming that's the way it needs to rotate, use your intelligence) and Overwrite existing files. (We made a backup, remember?)
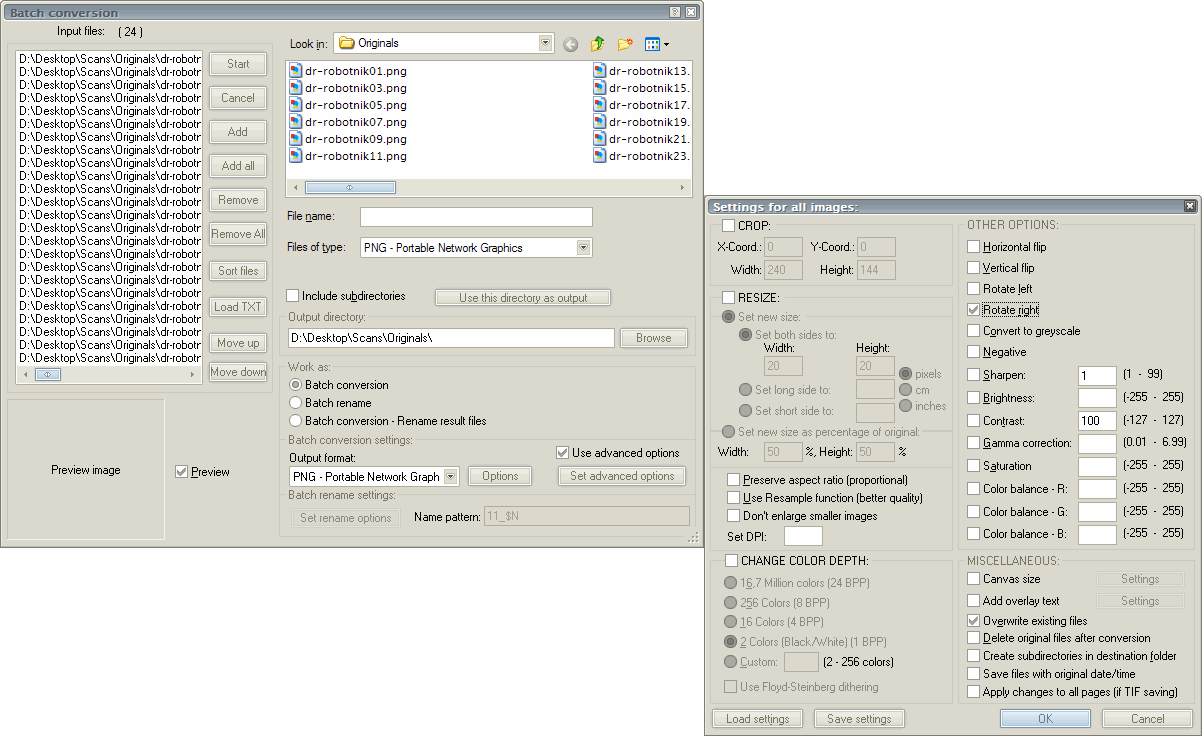
Then click OK, Start and it should do its magic and replace all the scans with rotated versions.
[Note: when I did it, I rotated the original scans; that was a bit silly, but it worked out OK. After that, I copied them to the working directory and kept the backups.]
TODO - make a better screenshot to avoid this note?
Cropping
The fun part here is that each file needs to split into 2 parts, but we want to keep the ordering. The first scan contains the front and back covers so that's pages 1 and 48. The second scan contains pages 2 and 3, the third is pages 4 and 5, and so on. We'll process the files in a way that won't screw this up.
First, make two new folders called "left" (for the left half of each image) and "right" (the right half).
Now press B again.
- Choose the same input files, but make sure they're in order (use the Sort files button).
- Set Output directory to point to the "left" folder.
- Now choose Batch conversion - Rename result files.
- In the advanced options, deselect the rotation and choose CROP. Set X, Y to 0, and set Width to half the width of the scans and Height to the full height. In my case, the scans were all 3470x1240 pixels so that was width=1735, height=1240.
- Set rename options and choose a suitable name stub, like "meanbeanmachine-##". (The ## shows it where to put the number.) Since we're doing the left half, the page numbers should be even so choose starting index = 0 and increment = 2.
Start and see what happens - you get all the left halves in that folder.
Now repeat it for the right halves. You need to change:
- the output directory - change to the "right" folder.
- the crop settings - set X equal to the Width value.
- the renaming - these are all the odd pages so set the starting index to 1, leave the increment as 2.
Don't forget to check the files are in order. Start and check you got all the right halves.
Now you can delete all the files in the working directory and copy the contents of "left" and "right" in there. Because of the numbering settings we used, they should all come out in the right order according to the filenames - check it now. The only problem is that the back cover is number 00 - so rename that file, in my case it became "meanbeanmachine-48.png".
Saving to JPG
The last step is to convert from our nice quality, but large, PNG files to lower-quality, but small, JPG files. Press B again and select all the single-page images. Click Use this directory as output, and Work as: Batch conversion. Set the output format to JPG and click on Options.
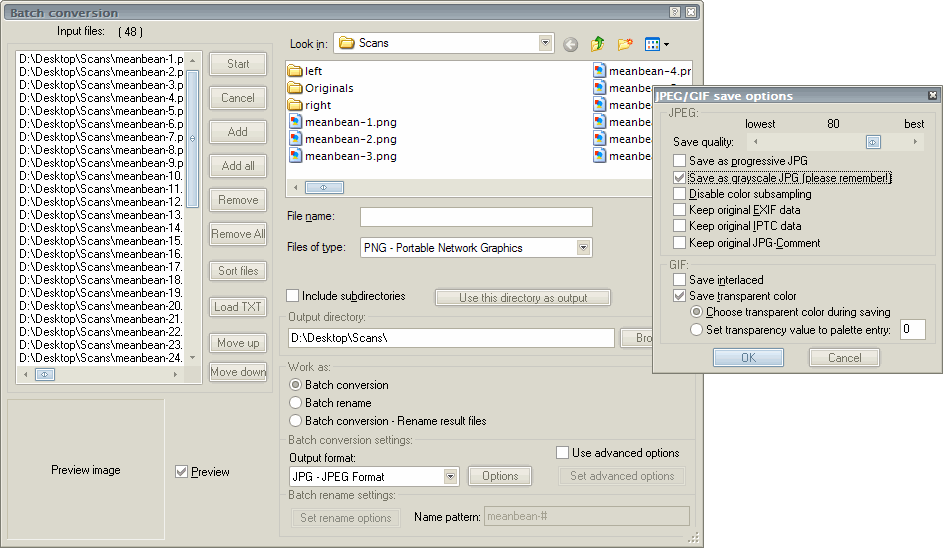
I've chosen grayscale (it saves a few bytes) and a quality of 80 (more is bigger files/better quality). Start and see what the result is - all your files are saved as JPG files in the same directory as the PNGs.
Open a few up and check the quality and the filesize. I tend to prefer a bit worse quality for manuals since they just need to be readable, and too much filesize makes them annoying. I aim for an average of about 100-140KB per file. These 48 JPG files are 5.5MB, so that's good enough.
If the quality or size is bad, delete the JPG files (not the PNGs!) and re-do the last step with a different quality setting.
The crop/convert process took me 15 minutes.
Quality compromises
Here's a few things I compromise on to allow scans to be done quickly:
- Cropping is not done well. It may miss a few pixels on one side and include a few extra on the other. For regular scans I like to scan too large and carefully crop, there's no time to do that 48 times. By cropping approximately in the scanner software I also save time because it will scan faster.
- Images are greyscale. I scan in greyscale for monochrome manuals - purple on white, blue on white or black on white. Scanning in colour is a waste of time and image size; for a minor loss (the original colour cast). I think the scanner goes marginally faster in greyscale mode, too.
- Images are scanned two pages at a time. This lets me scan in less time (not quite half - all the scans are twice as big) but it also means the automatic splitting is going to be a little inaccurate.
- I don't change the settings between scans. This means that if I scan one with the manual not in exactly the right place, it'll come out a bit skewed/cropped/misaligned. I try to be careful but it happens.
- I do a batch conversion to JPG. Working in PNG before then avoids loss of quality but the conversion to JPG is then a "blanket" level. Some of the images (eg. the front cover) could look better with less compression, others (eg. blank pages) could look just as good with more compression.
- I scan at a reasonable resolution - 300dpi, less for manuals with larger print - rather than at the highest resolution possible.
All of these could be altered if you prefer to do things differently, particularly the greyscale option which is more flexible. For some manuals or books I might also resize the images to be smaller - so long as they're readable, the smaller images might end up looking better than larger images with more compression artefacts for the same size. For certain material - particularly dithered images - I find you get the best quality by scanning at a high resolution (300dpi) and resizing down. I recommend you do this for magazine scans, for example.
